A tutorial how to install virtualbox for VM's on a headless server, combined with a webif to manage it all.
Step 01
Install VirtualBox to your server.
The website offers binaries for most major distributions, and some distros have it in the repository. For Debian-based distros, you may have to add the official Virtual Box repo:
$ cp /etc/apt/sources.list /etc/apt/sources.list.bkp
$ echo >> deb http://download.virtualbox.org/ virtualbox/debian wheezy contrib
------replace ‘wheezy’ with your distro name
$ apt-get update
$ apt-get install virtualbox
or
# apt-get install linux-headers-$(uname -r|sed 's,[^-]*-[^-]*-,,') virtualbox
Step 02
Virtual Extensions
Install them via wget
$ wget http://download.virtualbox.org/virtualbox/4.3.8/Oracle_VM_VirtualBox_Extension_Pack-4.3.8.vbox-extpack
Make sure it’s the version that matches yours.
Once that’s downloaded, you can unpack it and install it to VirtualBox using this command:
$ sudo VBoxManage extpack install Oracle_VM_VirtualBox_Extension_Pack- 4.1.22-80657.vbox-extpack
Again, make sure you use the correct version of your extension pack that you downloaded.
Step 03
Add User
We’ll need to add the relevant user to the VirtualBox user group. To do this we have to use something like this:
sudo adduser administrator vboxusers
…where ‘administrator’ is the user you’ll be connecting to the headless server with.
Step 04
Virtual create
To begin with, we’re going to be using the VboxManage tool to start creating and modifying virtual machines. Our first command will be:
$ VBoxManage createvm --name “Name of VM Here” --register
In our example we’re going to be using a Fedora virtual machine.
Step 05
Virtual modify
We’re going to now add some system information for the VM:
$ VBoxManage modifyvm “Fedora 17” --memory 1024 --acpi on --boot1 dvd --nic1 bridged --bridgeadapter1 eth0
We’re setting the memory to 1024MB above, as well as setting the boot priority to disc first.
Step 06
Virtual storage
Time to set up a virtual hard drive for our new VM to use. Create it using a command like this:
$ VBoxManage createhd --filename Fedora_17.vdi --size 10000
…where 10000 is the amount of storage in megabytes, so roughly 10GB in this example.
Step 07
Virtual IDE
The hard drive needs to be attached to the VM, and to do this the VM needs to have an IDE controller attached to it. We add one like this:
$ VBoxManage storagectl “Fedora 17” --name “IDE Controller” --add ide
We can also use this to add a virtual optical drive for the installation medium.
Step 08
Virtual attach
Attaching the hard drive requires a little more info than just pointing it towards the VDI:
$ VBoxManage storageattach “Fedora 17” --storagectl “IDE Controller”
--port 0 --device 0 --type hdd --medium Fedora_17.vdi
The ports and type are important to remember when adding further virtual devices.
Step 09
Virtual DVD
Finally, attach the installation medium to your virtual machine:
$ VBoxManage storageattach “Fedora 17” --storagectl “IDE Controller”
--port 1 --device 0 --type dvddrive --medium fedora17.iso
Port 1 is the first port after the hard drive.
Step 10
Virtual import
You can reuse an older VM from another machine by importing it into VirtualBox on your server. You’ll need to find the relevant machine in the Machines folder in the VirtualBox directory and copy it over to the new directory. Once that’s done, import it like this:
$ VBoxManage registervm Machines/ examplevm/examplevm.xml
Step 11
Headless start
Now we can start the virtual machine from the headless server using the very useful VBoxHeadless tool:
$ VBoxHeadless --startvm “Fedora 17”
This will also start a VRDP service so that you can remotely access the virtual machine from a networked computer.
Connect remotely to your VM
Step 12
Remote connect
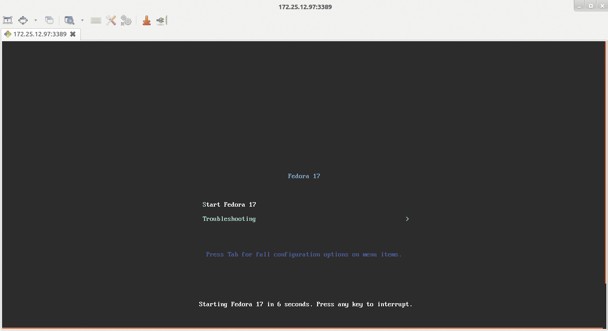
You’ll notice that the output from the startvm command will comment on what port it’s listening on, in our case 3389. Some RDP clients might automatically see it, but otherwise if you put in the IP address followed by the port into the client, it should pick it up.
Step 13 Headless options
There are some useful VBoxHeadless commands you can use to control the running VM:
$ VBoxManage controlvm “Fedora 17” poweroff
$ VBoxManage controlvm “Fedora 17” pause
$ VBoxManage controlvm “Fedora 17” reset
The commands are fairly straightforward: they power off, pause and reset the VM.
Step 14
PHPVirtualBox
While managing a headless server from the command line may be good enough for some, the existence of a graphical, web-based management system is useful for everyone. PHPVirtualBox is exactly that. We need to do some prep before we start, though. Make sure you’re root on your server and add a new user:
$ useradd -m vbox -G vboxusers
Create a password for the new user:
$ passwd vbox
Finally, edit the file at /etc/default/virtualbox and enter the following:
VBOXWEB_USER=vbox
This makes sure that the web interface runs as user vbox.
Step 15
Web server
For PHPVirtualBox, we need a web server that supports PHP. If you don’t already have one set up, you should install Apache 2 and PHP 5 on your system. If you’re using different versions of Apache and PHP, the tutorial will still work, though.
Step 16
Download PHPVirtualBox
Now we can download PHPVirtualBox. Move to /var/www and download the latest version of the file:
$ wget http://phpvirtualbox. googlecode.com/files/ phpvirtualbox-4.1-10.zip
Check the website for the latest version
Step 17
Install PHPVirtualBox
Once downloaded, unzip the software and move it:
$ unzip phpvirtualbox-4.1-10.zip
$ mv phpvirtualbox-4.1-10 phpvirtualbox
Move to this new directory and then create the config.php file from the example:
$ cp config.php-example config.php
Step 18
Configure PHPVirtualBox
Open up config.php in a text editor and add the details you need for the web server:
/* Username / Password for system user that runs VirtualBox */
var $username = ‘vbox’;
var $password = ‘password’;
Afterwards, restart the server and you should be ready to go.

Log In with PHPVirtualBox
Step 19
Log in
To get to your newly installted interface, enter your server’s IP address followed by /phpvirtualbox: for example, 192.168.1.254/phpvirtualbox. From here you’ll need to log in using the default user admin, with the password ‘admin’ as well. Once logged in, you can change this password.
Step 20
Adding VMs
Much like the standard VirtualBox UI, you can add and modify VMs with a series of menus that guide you through creating a hard drive and adding an installation medium. It will also give the same working prompts to let you know how long it will take when performing tasks.
Step 21
VM console
You have some limited use of the actual VMs thanks to the console view, although it’s not as good as using the RDP method from earlier in the tutorial. Simply launch the VM from the web browser and click Console. You can also launch from the web browser and connect via VRDP.
Step 22
Advanced use
Pretty much anything you can do in the standard graphical interface is available in the web interface – including attaching and detaching drives, and importing virtual machines from other places. Of course, you don’t have to abandon the command line if there are specific operations you want to do from there.
Step 23
Headless VMs
You now have a fully operational, and fully featured, headless virtualisation server. There’s plenty more you can do with this setup, which you will be able to discover over time, but for now you should notice no difference from using it locally.